Measuring PEEK compressive strength is not as simple as crushing a plastic cylinder and recording its peak load. The result depends on specimen geometry, temperature, loading speed, and conditioning. A small change in any of these can shift the reported value. That matters when comparing a machined component with a molded test coupon. Both may be PEEK, but they may not behave alike.
Polymer scientist Ian M. Ward’s work on polymer mechanics supports this practical reminder: “A strength value is meaningful only when its test conditions are clear.” Treat this as a summary, not a verified verbatim quotation. For repeatable results, document the test method, specimen dimensions, loading direction, and environment. ASTM D695 is commonly used for rigid plastics, but the chosen method must suit the material and purpose. Record the load and deformation, not just the final number. Watch for buckling, uneven contact, or a specimen that tilts under the platen. Small flaws matter. They can distort the result. This guide explains how to measure peek compressive strength, interpret the data, and report limitations honestly. One caution is easy to overlook: a neat value in a table may hide variation between samples. That deserves reflection.
PEEK compressive strength describes the stress it withstands before crushing or permanent deformation. It is not the same as compressive modulus, which measures stiffness. Compiled material-property database entries and technical datasheets commonly report about 125 MPa for unfilled PEEK at room temperature. Treat this as a reference, not a design limit. Results depend on grade, specimen preparation, temperature, and loading rate.
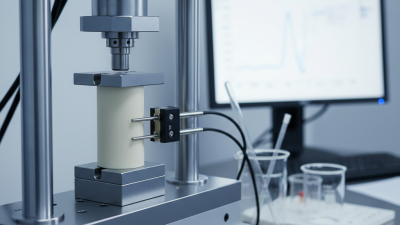
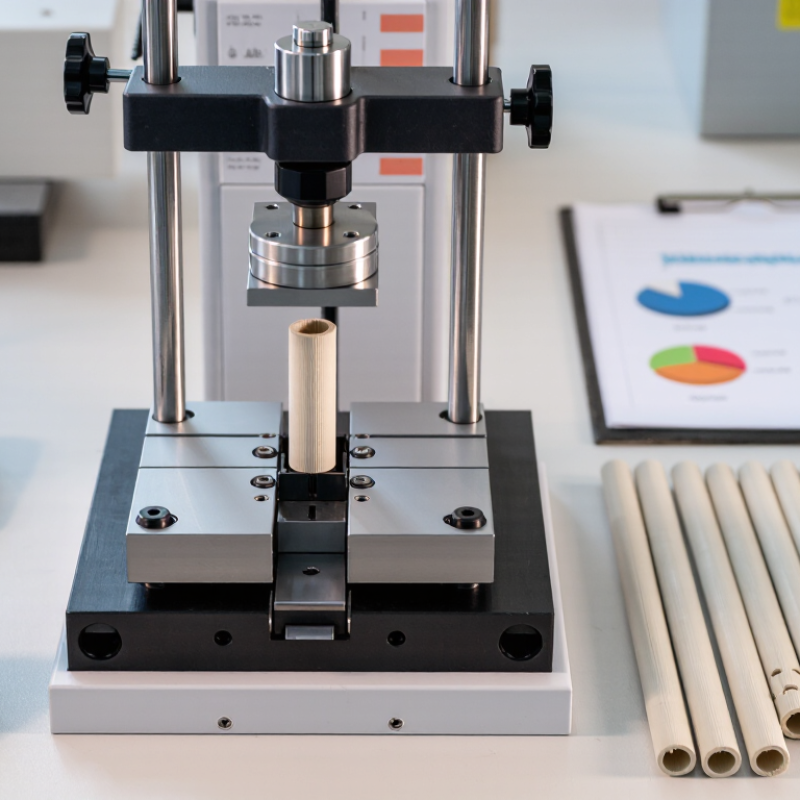
For a comparable measurement, follow ASTM D695 or ISO 604 and record the exact method. Test a properly machined specimen in a calibrated universal testing machine. Keep its faces parallel, align it carefully, and apply compression at the specified rate. A small alignment error can create uneven stress and distort the result. Report the specimen dimensions, conditioning, temperature, and whether the value represents yield or failure. That distinction matters.
Tips: Test at the service temperature when possible. PEEK softens as heat rises, so room-temperature data may not predict a hot assembly’s behavior. Keep replicates; one result is weak evidence. Compare only results produced with matching methods and conditions. A practical detail is easy to miss: moisture and machining flaws can affect consistency, even when PEEK absorbs little water.
Preparing PEEK specimens carefully is essential because compression results can reflect machining damage, not just material behavior. ASTM D695 specifies a standard cylindrical specimen 12.7 mm in diameter and 25.4 mm long; a square prism with matching dimensions is also used. Check dimensions with a calibrated micrometer, and keep the loading faces flat and parallel. Small errors matter. A slight tilt can create uneven contact and an artificially early failure.
Machine specimens without overheating the polymer. Use sharp tooling, light cuts, and steady feed; inspect edges for chips, cracks, and burrs under good lighting. For molded or extruded PEEK, record the material direction and keep specimen orientation consistent across the test set.
PEEK’s thermal history can affect its crystalline structure, so document how the stock was produced and prepared. ASTM D618 provides guidance on conditioning plastics, while ISO 604 describes compression-property testing; follow the applicable method and report conditioning details.
Do not assume that a dry-looking surface means identical moisture history. It is easy to overlook. Measure each specimen before testing, then note any visible defects rather than quietly discarding them.
That record makes comparisons more trustworthy.
How to Measure PEEK Compressive Strength?
Selecting the Test Standard and Equipment
Choose a recognized plastics compression method, such as ASTM D695 or ISO 604, before preparing specimens. These standards define specimen geometry, test procedure, and how results are reported. Do not treat their values as directly interchangeable. Small differences in dimensions or loading conditions can change the measured result. Check the current standard and state which method you used.
A universal testing machine needs a load cell suited to the expected force, plus flat, aligned compression platens. Poor alignment can introduce bending and produce misleading readings. That matters. Inspect specimen ends for burrs, uneven cuts, or visible damage, and record dimensions before testing. Use the standard’s specified loading rate and conditioning requirements. PEEK’s response can vary with temperature and processing history, so note those details rather than assuming every sample behaves alike.
Decide whether the reported value is stress at yield, maximum compressive stress, or stress at a defined strain. They are not always the same result. An extensometer can help measure strain, while crosshead movement alone may include machine compliance. A fixture that looks level is not proof of alignment. Check the setup, run a trial, and document any deviation; I would still question results that lack those details.
Measuring PEEK under compressive load requires controlled conditions and a clearly defined test method. Prepare specimens with consistent dimensions, smooth ends, and faces that sit parallel to the test platens. Small details matter. A slight tilt can concentrate force on one edge and distort the result. Record the material grade, specimen dimensions, temperature, and conditioning history; PEEK’s response can change with heat and loading rate. Select a current, applicable compression-test standard, then follow its specimen and test-rate requirements.
Place the specimen centrally between aligned platens and apply load at the specified rate. Calculate compressive stress by dividing force by the specimen’s original cross-sectional area. Track strain as well, while remembering that crosshead movement may include deformation in the test frame and fixtures. Use suitable instrumentation if accurate strain values are important. Report the maximum stress reached, or the stress at a specified strain, and state which definition you used. Repeat tests on multiple specimens to assess variation. A single clean curve can look convincing, but it may hide a setup problem or inconsistent sample preparation. Recheck alignment and dimensions before treating an unexpected result as a material property.
Compressive strength is calculated by dividing the highest recorded load by the specimen’s original cross-sectional area. If a 10 mm by 10 mm PEEK specimen reaches 18,000 N, the result is 180 N/mm², or 180 MPa. Keep the units consistent. Do not use the area measured after compression; the specimen may have bulged or changed shape.
The calculation is simple. The test setup is less forgiving. Record the test standard, specimen dimensions, conditioning, temperature, loading rate, and machine calibration status. Check that the platens are clean and the specimen sits squarely between them. Misalignment can produce uneven loading and misleading results. PEEK can also respond to temperature and test conditions, so comparisons need matching procedures.
State clearly what “strength” means in the report. It may refer to a peak stress, a yield point, or stress at a specified strain; these values are not interchangeable. Include the number of specimens, individual results, and average, rather than reporting only one polished figure. There is a catch: a tidy average can hide a poorly prepared specimen. Note unusual failures or visible deformation, and explain any excluded results. That small detail matters.